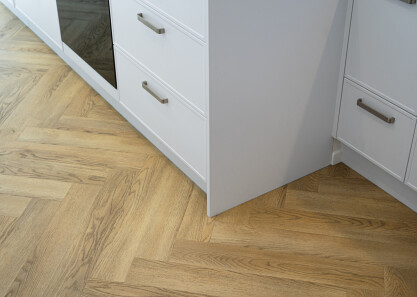
See how Cabin Oak laminate flooring creates a warm, contemporary finish in the KAD Build show home.
Installing a herringbone floor can be a rewarding DIY project, but careful planning and precision are key. Here’s a summary of the steps and tips to help you achieve a professional finish. If you are installing the product or need further details please refer to the Installation Guide.
Tools Required:
- Rubber mallet
- Chalk line
- Utility knife or jigsaw
- Spacers
Step 1: Find Your Centre
To start, measure both ends of the room to find the exact centre. This will serve as the starting point for your herringbone pattern. A cantered layout ensures symmetry, which is essential for the striking look of herringbone flooring.
Step 2: Set Your Working Lines
From your centre mark, measure 4.1 cm to the left and right, snapping chalk lines along the entire length of the room. These lines serve as guides to help you keep your pattern straight as you lay the planks.

Step 3: Divide “A” and “B” Boards
Each herringbone pack comes with “A” and “B” boards. To begin, place the long side of a “B” plank over the short end of an “A” plank. Align and lock the planks together by tapping the top of plank “B.” This is the start of your “V” formation, which will define the herringbone design. Continue laying your boards, ensuring the “V” pattern remains consistent throughout.

Step 4: Lay Your Rows
As you move to the next row, remember to continue forming columns until you reach the opposite side of the room. Leave the last 5 cm of each seam untapped; these will be tapped and locked once the adjacent column is added. Check your chalk lines regularly as you work, adjusting as needed to keep the pattern straight.
Step 5: Allow for Expansion
For a long-lasting installation, use spacers along the perimeter of the room. This will leave a small gap that allows the flooring to expand and contract naturally. Once the installation is complete, remove the spacers and cover the gaps with trim.
Step 6: Continuing the Pattern
Continue forming columns until you have reached the opposite end of the room. Check your working lines to keep the pattern straight. Connecting the next row of planks, slide the new plank underneath the untapped edge and continue.


Step 7: Cutting around Objects and Finishing Touches
For any objects in the way, make a template and cut the pattern out of the plank. This can be done with a utility knife or jigsaw. To finish, remove all spacers and cover expansion gaps with a trim - fill any expansion gaps around potentially weta areas (bathrooms, laundries) with a waterproof silicone caulk.
Please Note:
This guide provides a summary of the key steps, but always refer to the full installation guide for detailed instructions, including layout techniques and finishing touches. Proper preparation and patience will go a long way in achieving a stunning herringbone floor that lasts for years to come!